Snare Drum Music Notation for Better Beginner Reading
Learn snare drum music notation with single-line staff rules, rhythm counting, accents, sticking checks, and a practical beginner practice workflow.
Send this article to your music workflow stack.
Instagram sharing uses copy link, then paste it in Stories or DMs.
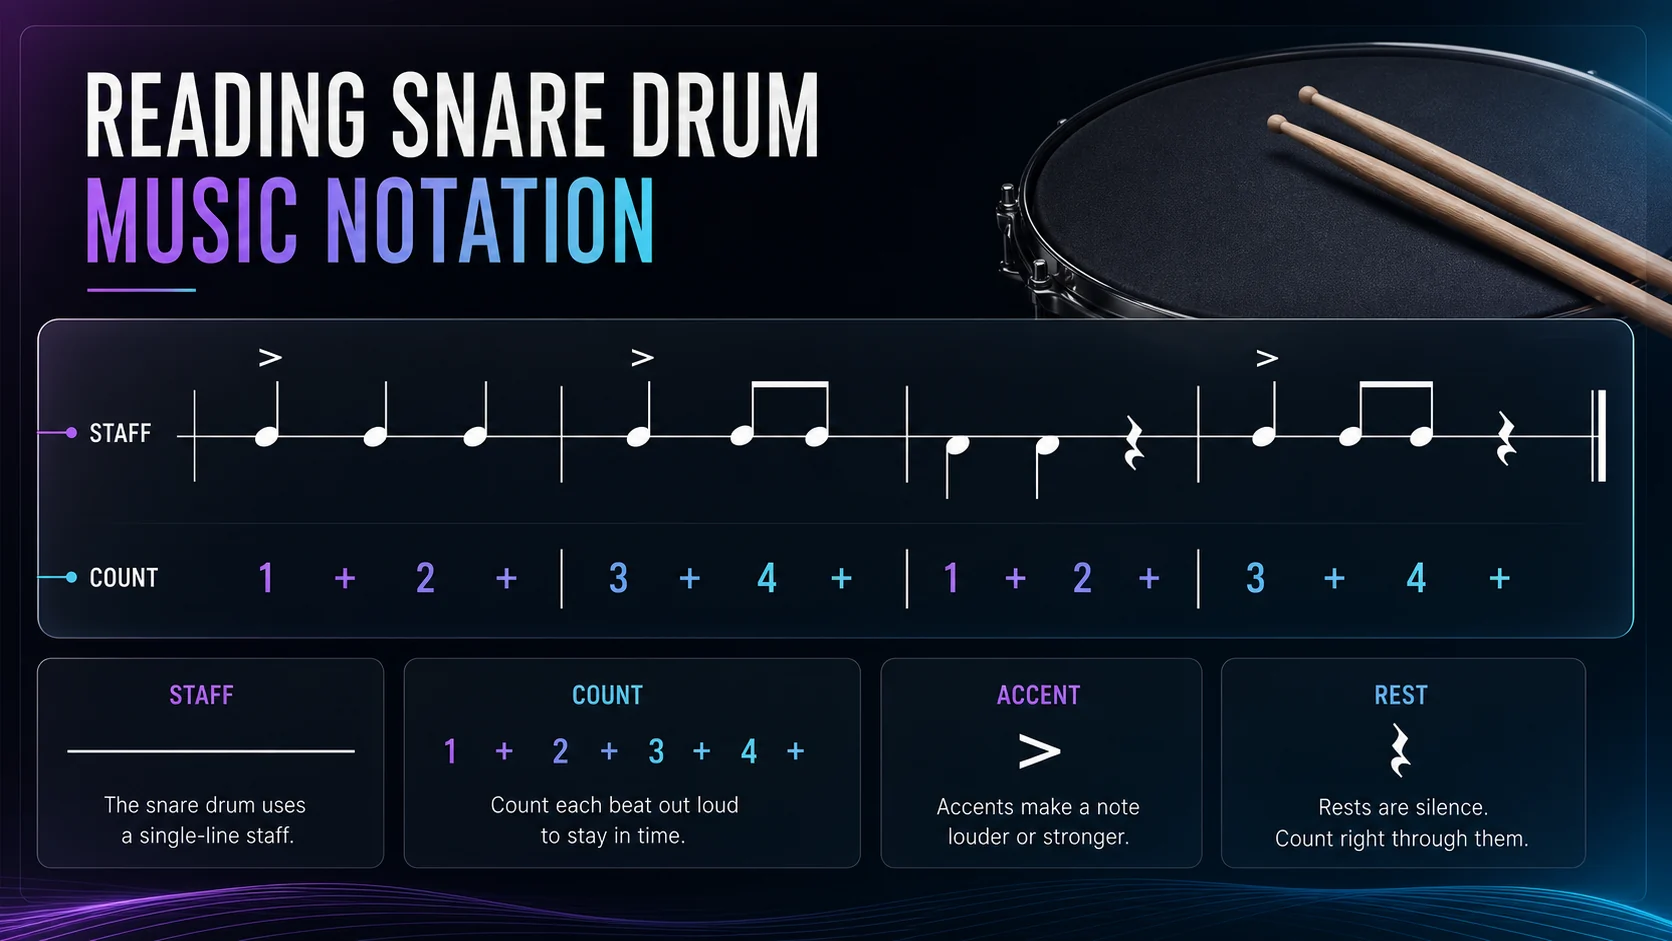
Snare drum music notation looks simple at first because the part often sits on one staff line. The catch is that the line only tells you where the snare voice lives. The real reading job is rhythm, accents, rests, rolls, sticking, and how cleanly you can turn the printed bar into sound.
Start by treating the page as a time map. Read the count, find the snare hits, mark any accents or rests, then practice one bar slowly before you chase speed. If the source is a PDF, scan, or ensemble part, that same reading order also helps you decide whether a digital playback or MIDI reference is useful.
Start with the single-line staff
Most beginner snare parts use a percussion staff where the snare voice is placed on one line or one space. Unlike piano or violin notation, the vertical position is not asking you to find a pitch name. It is telling you which percussion sound to play.
That means the first question is not "what note is this?" The first question is "where is the beat, and what kind of hit is written there?"
Use this quick map when a new snare part lands in front of you:
| Notation signal | What it tells you | First beginner action |
|---|---|---|
| Snare notehead | A snare hit occurs at that point in time | Say the count before playing |
| Stem and flag or beam | The note value and rhythmic grouping | Clap the rhythm without sticks |
| Rest | Silence that still takes time | Count through the rest out loud |
| Accent mark | A stronger stroke | Play louder without rushing |
| Repeat bar or ending | The path through the exercise | Mark the repeat before the first run |
If you are still learning how staff lines and measures work, read the musical stave guide first. Snare notation uses a simpler pitch map, but it still depends on measures, beats, rests, and repeat structure.
Read the rhythm before the sticking
Snare notation becomes easier when you separate rhythm from hands. A beginner often wants to decide right hand or left hand immediately, but sticking choices only make sense after the rhythm is stable.
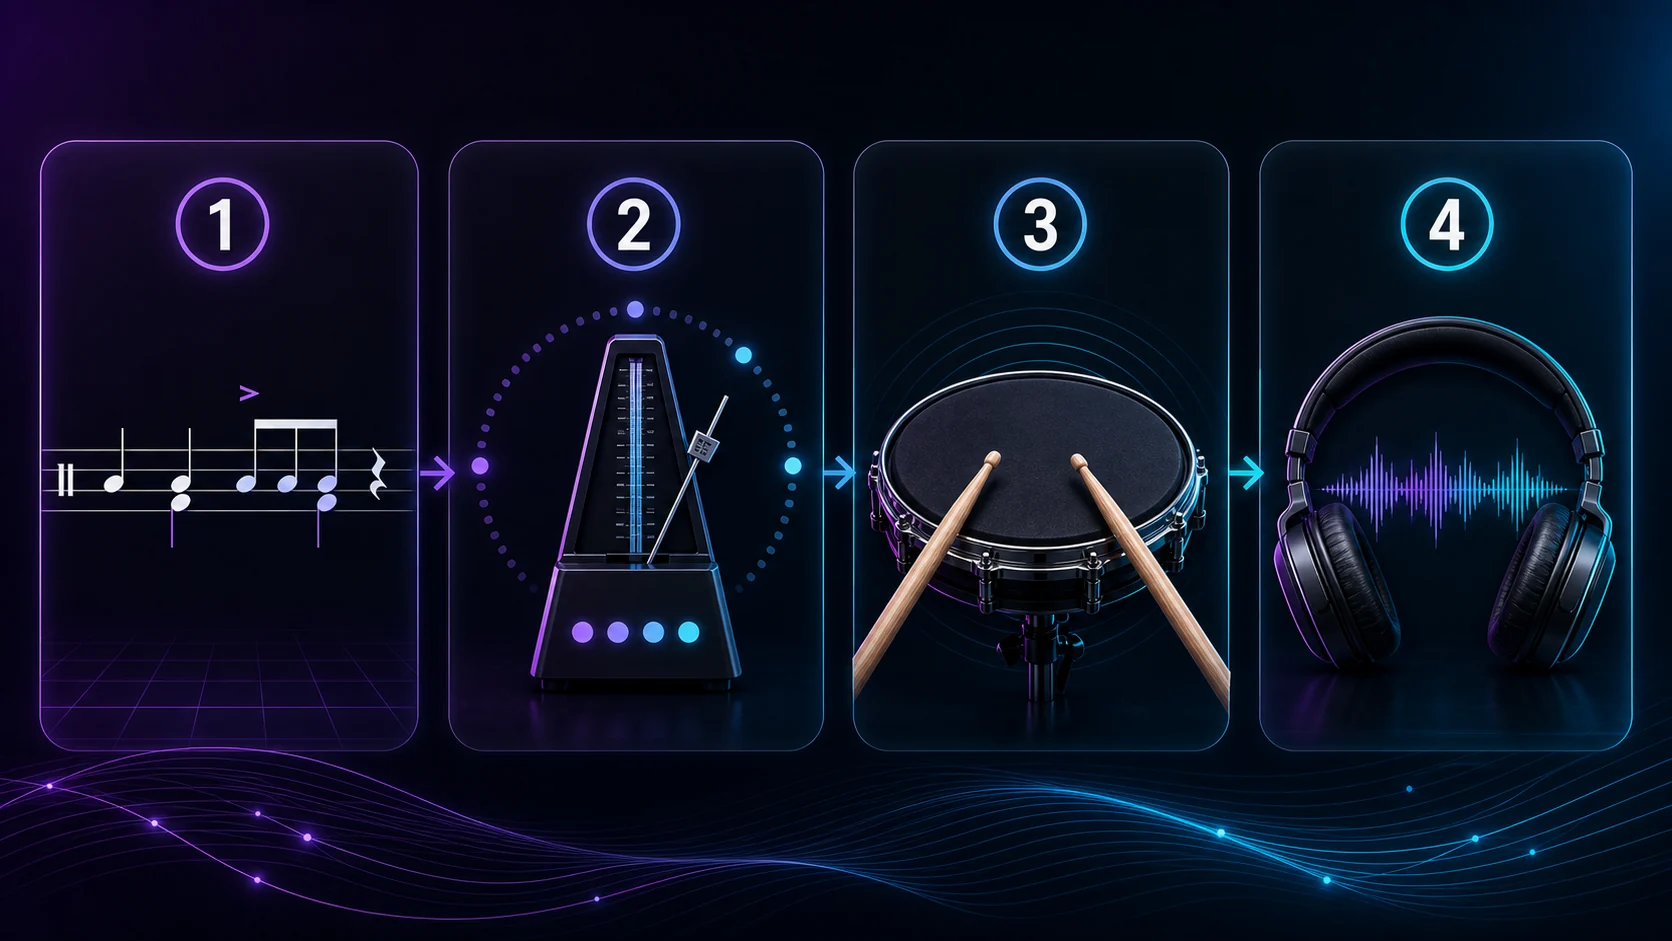
Try this order:
- Count the measure without moving your hands.
- Tap the rhythm on your leg with one hand.
- Add the written accents at a slow tempo.
- Choose a sticking pattern only after the rhythm is clear.
- Play the bar on a pad or drum.
For a simple eighth-note bar, say 1 + 2 + 3 + 4 + before you play. For sixteenth notes, say 1 e + a 2 e + a. The syllables are not decorative. They keep the spacing honest when the page gets denser.
If rhythm is the hard part, the related guide on how to play tricky rhythms gives a broader count-hear-loop method that also works for snare exercises.
Separate accents, rolls, and buzz marks
Snare notation is not only about when the drum is struck. It also tells you how the stroke should feel. Accents, flams, drags, rolls, buzz marks, and sticking letters can change a simple rhythm into a technical exercise.
Read these details after the basic rhythm:
| Mark or detail | Plain meaning | Practice check |
|---|---|---|
Accent > | Play that note stronger | Keep the louder note in time |
| Flam | A soft grace note before the main note | Keep the grace note close, not late |
| Drag | Two small grace strokes before the main note | Slow it down until the spacing is even |
| Roll slashes | Multiple strokes or sustained roll effect | Match the written duration, not just speed |
R and L sticking | Suggested right and left hand order | Use it to solve flow and rebound |
The common mistake is to treat every mark as a volume instruction. A roll is a duration problem. A flam is a spacing problem. A sticking is a motion problem. Solve the musical job each mark is doing, then bring the bar back to tempo.
Decide when a reference format helps
Snare music can appear in several forms: standard notation, drum tabs, PDFs, exercise books, method pages, or ensemble parts. Each format helps a different job.
| Format | Best use | Watch out for |
|---|---|---|
| Standard snare notation | Rhythms, rests, accents, rolls, ensemble timing | Requires counting before it sounds musical |
| Drum tabs | Quick kit mapping and informal grooves | Less standardized and often less precise |
| PDF exercise page | Practice, printing, classroom handoff | May need a slow manual read before playback |
| Audio or video | Sound, tempo, feel, and stroke quality | Does not show every written detail |
If your source is tab-like instead of staff notation, use the guide on how to read drum tabs. Tabs and standard notation both move left to right through time, but standard snare notation carries more precise rhythmic information.
Practice one bar before the whole etude
The fastest way to make snare notation feel hard is to practice too much of it at once. Take one bar, make the count steady, then expand.
Use this loop:
- Read the bar silently and name the note values.
- Count the bar out loud while pointing at each beat.
- Clap the rhythm once without accents.
- Add accents or rolls with your hands still away from the drum.
- Play on the pad at a slow tempo.
- Listen back or record one pass.
- Fix the bar that broke before moving on.
That order may feel slower than just playing. It is usually faster because you are not mixing five problems together. Rhythm, accent, sticking, rebound, and tempo each get their own pass.
Where Melogen fits
Melogen is not a drum teacher, and it does not replace rudimental practice. The useful fit is narrower: when your source is visible notation, a clean PDF, or a readable scan, a tool such as Sheet2MIDI can help you create a first-pass playback or MIDI reference for review.
Use that kind of workflow carefully with snare parts:
- Start from the cleanest scan or PDF you have.
- Check whether the notation is standard enough for recognition.
- Listen for obvious rhythm or rest mistakes before trusting the file.
- Return to the written page for accents, rolls, sticking, and technique.
In other words, use a digital pass as a reference bridge, not as the final musical answer. Snare notation still needs your count, your hands, and your ears.
Turn clean visible notation into a playback reference
Use Melogen Sheet2MIDI when you have a readable PDF or scan and want a first-pass MIDI reference before doing the musical cleanup yourself.
The practical takeaway
Snare drum music notation is easiest when you read it in layers. The staff shows where the snare voice lives. The rhythm tells you when the notes happen. Accents, rolls, rests, and sticking marks tell you how the bar should feel.
Keep this checklist nearby:
- Count before playing.
- Treat rests as time, not empty space.
- Add accents only after the pulse is stable.
- Practice rolls for duration, not just speed.
- Choose sticking after the rhythm is clear.
- Fix one bar before running the whole exercise.
Once that process becomes familiar, snare notation stops looking like scattered marks on a line. It becomes a practical practice map: read the time, shape the touch, then make the bar sound intentional.
About the author
Zhang Guo
Composer - AI Product Manager
AI product manager and digital marketing consultant with a background in music. Creativity is the bridge between rhythm and logic, where musical intuition and mathematical precision can coexist in every meaningful product decision.
Follow on X