How to Turn MIDI Into Audio in FL Studio and Export WAV
Turn MIDI into audio in FL Studio by assigning instruments, choosing the right render range, and checking the WAV for silence, missing parts, and tails.
 Zhang Guo
Turn a static score into editable MIDI
Contents
To turn MIDI into audio in FL Studio, make the notes play an instrument, then use File > Export > Wave file. Choose the required song or pattern range in the render dialog and start the export. The resulting WAV contains sound; exporting another .mid keeps the notes as performance data.
The most useful check happens before export: if you cannot hear the intended part when you press Play, fix the instrument or routing first. A different file extension will not make a silent MIDI channel audible.
Choose a pattern, a full arrangement, or a time range
Decide what the recipient needs before opening the export dialog.
| Desired result | Prepare in FL Studio | Check before rendering |
|---|---|---|
| One repeating musical idea | Select the intended pattern | Every required instrument is in that pattern |
| The arranged song | Use Song mode and inspect the Playlist | The complete arrangement plays from its beginning |
| A short section | Select the intended time span in the Playlist | No old selection is restricting the range |
| A sound from external MIDI hardware | Record the hardware's audio return first | A real audio recording is present in the project |
An imported file may contain several parts. Rendering only the currently selected pattern can miss material placed elsewhere in the Playlist. Conversely, an unnoticed time selection can shorten a song export. Inspect the requested range as a musical decision, rather than accepting whatever the last session left selected.
Make the MIDI play an instrument
If the notes are already in a Piano Roll, leave them there and check the channel's instrument. For an external .mid, use FL Studio's MIDI import options to bring in the required channels. Keep a project copy before changing sounds or import settings.
Use a simple piano or bass patch for the first listening pass. Solo each musical part briefly, then play the arrangement together. You should be able to identify the melody, bass, and any intended percussion separately. Assigning a sound is especially important when a file imports into MIDI Out channels intended to drive external hardware.
Image-Line's no-sound troubleshooting guide distinguishes MIDI instructions from the instrument that produces sound. For a software-instrument render, verify that the instrument's audio reaches the Master through the Mixer. An external synth also needs an audio connection back into the computer; its MIDI cable carries no recording.
If the patch choice is still open, the piano VST workflow guide explains how to audition the part without confusing a new timbre with a different performance.
Set the render range and the ending
Save the .flp, choose File > Export > Wave file, and name the WAV so its part and tempo are clear. In the export dialog, review the project type and length before starting.
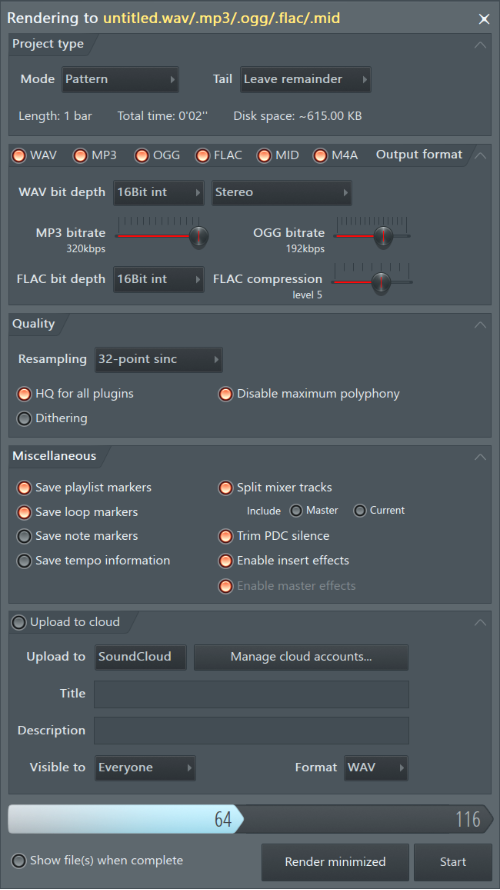
The current FL Studio export manual documents three tail choices. Use a retained decay for a standalone phrase with reverb, a fixed ending when an exact-length file is required, or a wrapped tail when making an appropriate repeating loop. Listen across the loop boundary if you choose the last option.
For a file that will return to a DAW, WAV is a practical starting format. Match the sample rate to the destination project, choose a suitable bit depth for that destination, and avoid adding normalization or mastering processing just to make a technical check louder. Keep the first pass easy to compare.
Test the result with a two-part MIDI example
Download the original two-part 96 BPM MIDI exercise. It contains six melody notes and two bass notes in two bars of 4/4. The two-bar grid lasts five seconds at 96 BPM, before any added sound decay.
Import it into a spare project and assign recognizable piano and bass sounds. Render the two-bar range, then bring the WAV onto an audio track at the same bar position. Mute the MIDI instruments while checking the WAV, so both versions do not play together.
Check the opening note, the bass change at the beginning of bar two, and the short last melody note. These three landmarks reveal a wrong start, a missing part, or an incorrect range quickly. The exercise is an original MIDI reference, not an FL Studio audio preset; its final sound depends on your selected instruments.
Fix silent, short, or unexpectedly loud exports
| Symptom | First check | Useful correction |
|---|---|---|
| WAV is silent | Can the instrument be heard during playback? | Assign a sound and check the route to the Master |
| Only one phrase appears | Pattern/song choice and Playlist selection | Render the scope that contains the arrangement |
| Last chord or reverb stops abruptly | Render endpoint and tail choice | Extend the range or preserve the required decay |
| Comparison sounds much louder | MIDI and returned WAV both playing | Mute one version before judging level |
| Hardware synth disappears | Whether its audio was recorded | Record its audio return before the final render |
Make a browser preview when the FL Studio sound is not required
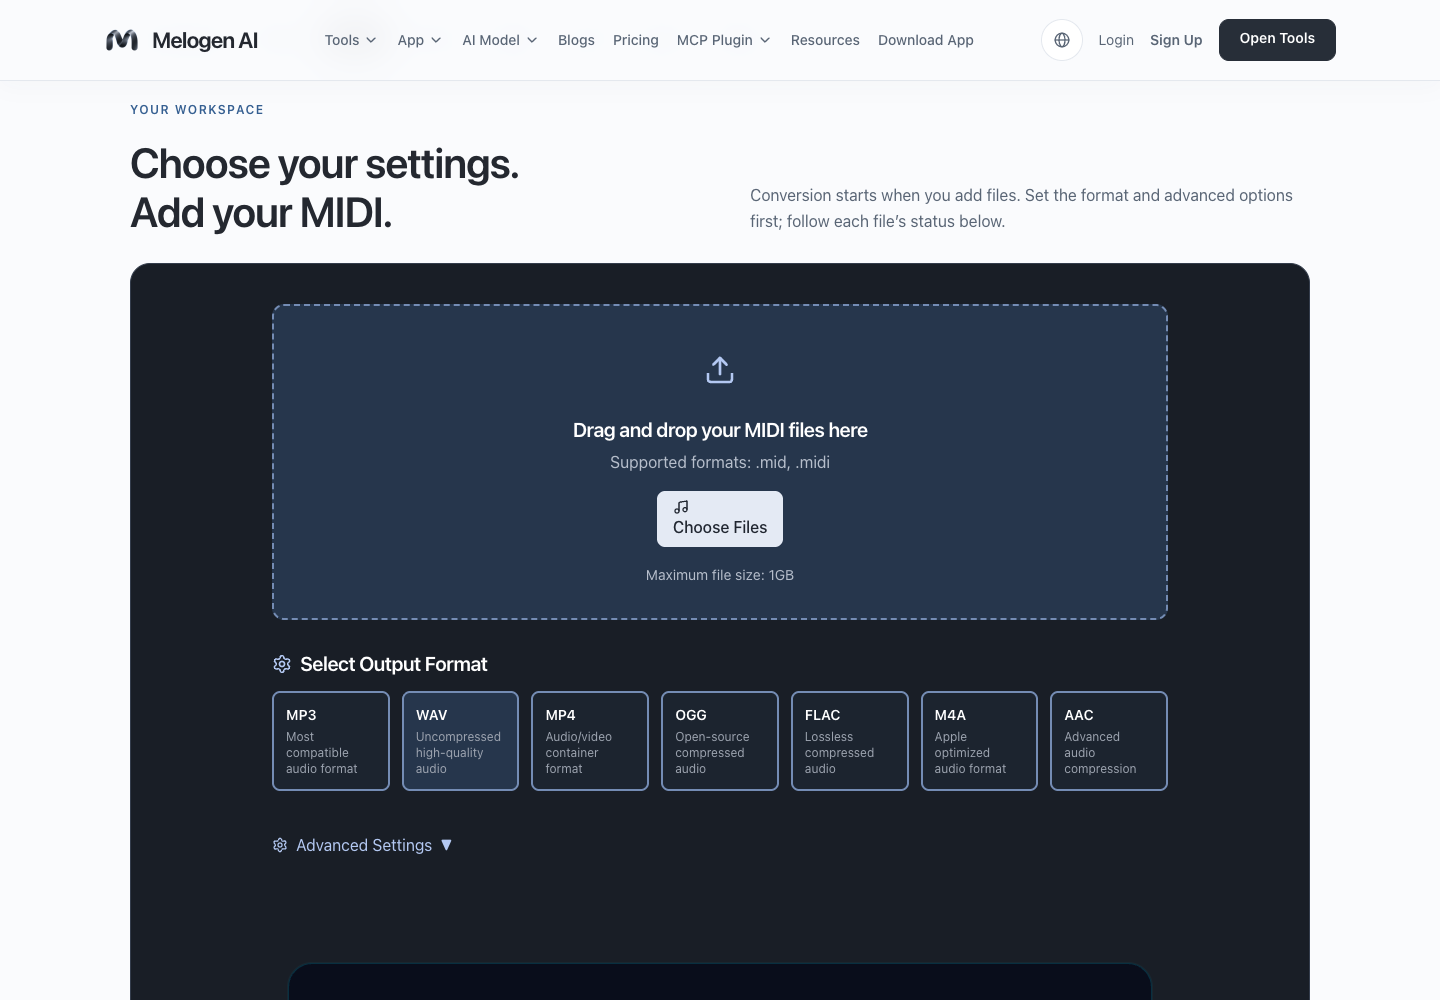
If a collaborator only needs to hear the notes in a standalone MIDI file, Melogen MIDI to WAV offers a separate rendering route. It does not open an .flp or reproduce your FL Studio plug-ins, Mixer chain, or automation. Export from FL Studio when those choices are part of the sound you need to deliver.
For an editable handoff, keep the MIDI beside the WAV and include the tempo and instrument intent. The guide to sharing a MIDI file covers that packaging decision.
Make a WAV preview from a standalone MIDI file
Use Melogen for a separate MIDI listening reference, and use FL Studio's export when your project instruments and effects must be preserved.
Check the exported file before sending it
Play the saved WAV outside the project, confirm the beginning and ending, and check that every intended part is audible. Keep the .flp for future production changes and the .mid when the recipient needs editable notes. A successful render is a file that contains the intended music over the intended range.
About the author
Zhang Guo
Composer - AI Product Manager
AI product manager and digital marketing consultant with a background in music. Creativity is the bridge between rhythm and logic, where musical intuition and mathematical precision can coexist in every meaningful product decision.
Follow on X